


Thank you! Your comment has been submitted successfully. You should be able to view your question/comment here within a few days.
Error submitting comment. Please try again momentarily.
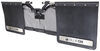
Keep dirt and debris off the front of your towed vehicle while you're flat towing. Polyethylene panels with an aluminum frame create a robust shield for your car while still being able to flex with the wind, keeping it aerodynamic.
Features:
Specs:
Note: Cannot be used with Blue Ox AutoStop braking systems.

Videos are provided as a guide only. Refer to manufacturer installation instructions and specs for complete information.
Hey there flat towers. Today on your 2018 Ford F-150, we're gonna be taking a look at and showing you how to install Blue Ox's Kargard. And this is what our kargard looks like when it's installed. You can see here that it provides us a shield all the way across the front of our vehicle. So, when we're hooked up to our motor home and the motor home's throwing up dirt, debris, rocks and everything else out there on the road. Not to mention, just the bugs and everything else that are just naturally out there in the wild when you're trying to flat tow your vehicle.
It's gonna protect your vehicle from all those things that are being thrown up on it. So, no longer do you gotta worry about having a nice vehicle that you bought, that was brand new, that you've put hardly any miles on, 'cause you're flat towing it across the country. But, the front end of it looks like it's been on the road for 150,000 miles. Not anymore. This will protect you from all that dirt and debris.
Now, of course, you still want to wash your vehicle and you can see here, depending on your vehicle, it may not encompass the entire cap of the vehicle. It's doing the best that it can though. This is a huge cover for a lot of your smaller vehicles, like your cars and SUVs. It does a great job on your trucks here. You can see that it still does a pretty good job but our customer opted to get a bug deflector as well.
And I would recommend that as well to protect a little bit here that our kargard is gonna miss. So, now that we've covered some of the features of our kargard, why don't you follow along with me and we'll show you how to get it installed. It's really not that hard to set up. We are gonna have to remove a few bolts from our tow bar, but you do get all the necessary hardware included with your car guard to replace those bolts. And it does come with various brackets and hardware for the different styles of tow bars.
So, once you get all done, if you got a few bolts left over, just check your instructions. Those bolts we're likely for a tow bar that you don't have. So, you didn't need those pieces of hardware. We'll begin our installation by removing the factory bolt here. After we get that, it zips off of there. We're gonna use the longer bolt that comes in your kit. We're gonna drop it down through the closest hole to the cup there, set it in place, and then install our new nut on the bottom. And these are the longer bolts that come in your kit. We'll then, snug it down. We don't wanna run it all the way down just yet because we wanna be able to orient it as necessary, so. You're just kind of snugging it up. That's pretty good there. Maybe a little bit more just to get rid of some of the play. There, we can still maneuver it so, we can come back and fully tighten that later, but that'll be a good starting point right there. We're now gonna take the tower legs here and put 'em in place. The plastic cap you see there needs to face upward. So, it's just gonna drop down in there. Same on the other side. After you get 'em dropped in there, we're gonna pin 'em into place. The hole here at the bottom should line up with the holes here. You can see that there. I'm gonna switch it just for a side one. Like that. Pin that in and we're gonna pin in the other side the same way. We're now gonna install our upper and lower clamps and brackets. So, just take these and slide it over your bar. We want it to face outward like this. So, we're gonna have one at the top and we're gonna have one lower down. We're not gonna, we don't have an exact position for 'em yet. So, we're not gonna tighten the hardware super tight so we can slide it up and down to get the appropriate spot. This is your lower bracket and this is your upper bracket. We want the pins that you see there to be facing up. Just like you see here. So, this one's gonna go on there. The other one will go up on the top one. So, we're gonna slide this one in place Just like that as well. We'll go ahead and put the lower one on first. This is gonna use the smaller bolts that come into your kit with a lock washer on it. That's gonna slide through the bracket. The clamp there, into the lower bracket. Same thing for the upper bracket. It's gonna slide through the clamp and right into that. And again, we don't want it to be super tight at this point. So we're just gonna put 'em in there, hand tight for now. And then we'll snug 'em down here. When we get it closer to being in position. We're gonna loosely install the other side the same way. On the top of each one of our brackets, go ahead and slide on one of the rubber gaskets. Next, we're gonna open this guy up. So, just go ahead and set it on the ground and get it all the way open. They are pretty stiff. So, you might even open to lay it down just to get it to open up. We're gonna take the lock rod here and slide it from the top. We can tell it's top because Blue Ox is written up there. Down, this'll hold it in the expanded position for us. There is a small pin that goes at the bottom there to hold that in place. We can go ahead and put that in there at this time as well. Now, we're gonna lift it up and we're gonna find the most appropriate holes that this will line up in. It's kind of looking like, this is wider than most of our attachment points here. Looks like this outer slotted hole might be our winner. So, I'm gonna slide it on there. We're gonna check the other side and see if it lines up. But honestly, I don't think it's gonna line up there either. So, we'll just, looks like we're gonna have to redo our bracketry since none of them line up, I guess we're gonna take 'em all off and flip 'em around and face 'em towards the inside. This is the recommended position, but if it doesn't line up on your vehicle, you just gotta figure out the appropriate orientation to where it does line up. So, we're just gonna set it back in place now. And it looks like that will line up with our slotted holes now. So, now we know how it's gonna line up. It's gonna line up with the slotted holes. We're gonna go ahead and pin in the top ones. The bottom ones don't actually have pins. So, just bring up your top one there, set it in place. Grab one of the pins out of your kit. Clip it on in. We're gonna clip in the other side the same way. Clip it in. Next thing we're gonna do is, we want this to, we don't want it to be resting on our tow bar like it is right now. So, we'll lift it up a little bit and then we're gonna snug down the upper brackets to hold it in the position we want. Then, we can raise the lower brackets up into their slots and snug those down. So, we're just grabbing our wrench here. Pulling upward on it. I think we're just gonna probably set it up pretty close to the top of the bar like that, 'cause of the way this one sits and snug it on down. And we'll snug down the other side. We're gonna raise it up so, it's in roughly the same position as well and snug it down. All right, so now it's holding itself up. It is not resting on our tow bar, so we're gonna bring our lower brackets now, up. Slide them into position and then we're gonna snug them down. So, now we can go back and snug our bolts up that we had left loose. Once all your hardware's tightened down, the only thing we really want to do next is to just verify that we're easily able to remove it and put it back in place. And there's a couple of ways you can do that. You can either pull the pins at the top here and slide this off of the arms or we can pull the pins down below and remove the entire thing, which is what we're gonna do. We're gonna pull the lower pin on each side, pull that one out. Here's both of our pins removed. We can then see that it slides right out of there pretty easily. Recheck that it drops back down in there easily. Looks like that was pretty easy. And then, just double check that your pins reinstall okay. And if everything seems good there. And that completes our installation of Blue Ox's kargard, on our 2018 Ford F-150..
Customer Satisfaction Score:
96% were satisfied with this product
4% of customers were not satisfied
Ratings & Reviews




Jenny N.
6/24/2022
I reached out to Blue Ox who will reach out to you. They advised that it is possible that very high winds or road debris that impacted the shield just right could be the cause.
Mark

4/27/2022
Fantastic! I towed my Jeep 2500 miles to Yellowstone and back. Stopped at National Parks along the route. Quick connect and disconnect made it easy. One tip: I bought the 7500 lb tow bar. Had to make several sharp turns. The tow bar is longer that the 5000 lb tow bar. The extra length prevented the Motorhome from making contact with the Jeep!
Steve
8/17/2022
Outstanding. Continues to work exactly as expected.
Mike
8/13/2023
It’s been a year since purchase and installation of the KarGuard and it hasn’t disappointed in working just as promised. I can’t say that it’s saved the front end of our Jeep however I’ve not seen any damage to her nose after our many trips so the guard is doing it’s job!
Tommyd
9/21/2017
This product works as described. Keeps the front of my Jeep free from stones and other debris that gets kicked up from the motorhome.
Wes
6/16/2024
The KarGard we use for our 2023 Buick Encore GX does an excellent job at protecting our car as we tow it behind our Winnebago Tour. It’s easy to setup and protects the front from all road debris. This is one of the best parts about using our BlueOx tow system.
Daniel
8/12/2023
Its been a year & we have travelled thousands of miles using the KarGard shield to protect my Jeep & it hasnt suffered a single stone chip. This was well worth the price to pritect out toad


Do you have a question about this Accessories and Part?
Condition: Like New
Notes: May have damaged packaging or minor cosmetic blemishes.
Info for this part was:
At etrailer we provide the best information available about the products we sell. We take the quality of our information seriously so that you can get the right part the first time. Let us know if anything is missing or if you have any questions.
































Kate F.
6/25/2026
Glad to hear the set-up is an easy one Thomas. I think this Blue Ox will hold up against Alaska! I heard it is absolutely breathtaking up there, would love to go there one day myself. - Enjoy and Safe Travels =)